Spring is Hatching Time
Every year, as winter slowly gives way to spring, my mind always turns to hatching eggs. Many folks buy their baby chicks from a poultry house and pick up their day old babies from the post office. As many of my neighbors have chicken flocks, I usually attempt to hatch my own eggs if my flock needs a boost in population. This year it needed a complete redo.
When our flock reaches a certain age, we have always let them free range. This is wonderful for the chicken, at least for diet and freedom, but with the many predators around, it can also deplete your flock quickly if it is discovered that a free meal can be had by visiting your place. By late last summer, we were down to only two remaining roosters.
Hatching eggs in an incubator can be a tricky thing. Nothing works better than a chicken mama does, so anytime you use an incubator - expect a smaller hatch. That is rule number one; never count your chickens before they hatch.
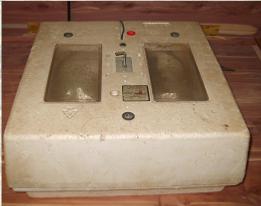
Incubators can be anything from a Styrofoam cooler with a light bulb to heavy commercial models or according to plans I've found on the net, anything in between. We have a 'Little Giant' that I purchased years ago at a feed store. If I had known then, what I know now, I would have purchased the egg turner to go with it. Like many things in life, hatching eggs is a live and learn experience.
So, in that vein, here is what I've learned over the years.
1. Start with fresh eggs. The older the egg, the less chance it has of hatching. I attempt to gather eggs less than a week old.
2. Fill the incubator as full as possible. I use paperboard egg cartons, cut to fill every possible space.
3. Place the eggs into the cartons BIG side up.
4. Open the incubator as little as possible. You shouldn't have to open the lid more than 4 times during the course of hatching.
5. Turning the eggs is important. The easiest way I've found to do this is to place a thick book (three inch or more) under one side of the incubator. Move the book around to all four sides during the course of a day. Do this consistently for the first 18 days.
6. Add a small amount of water (less than 1/4 up) on the first day. Add water to bring the level back up to 1/4 cup on the 7th and 14th day.
7. On day 18, remove the eggs from the cartons and lay them flat on the bottom of the incubator. Add up to one cup of water. Replace the lid and don't open the lid or turn the eggs again until all the eggs have hatched.
8. On day 20, you should begin to see eggs begin to 'pip' or hear cheeps from within the eggs. Resist the urge to open the incubator.
9. On day 21, your eggs should begin to hatch. Again, resist the urge to open the incubator. This will cause moisture to escape that the hatching chicks need to get out of the shell.
10. On day 22, open the incubator and remove any hatched chicks. Do this as quickly as possible and replace the lid. Some chicks are late bloomers and can come as late as day 25.
That's it - my way of hatching eggs. I'm on my third run of eggs and with any luck, my flock will be complete after this hatch. By hatching eggs every six weeks, the brooder is always ready for a new hatch, as it takes chicks about six weeks to feather out fully enough to be put on the ground.
There are many old wives tales associated with hatching eggs. Two of my favorites are:
Eggs won't hatch during a thunderstorm. This one I've found to be basically true, I've lost many a chick in the shell because of an ill timed spring storm.
Never hatch in March. So far, I haven't been able to prove this one - I've always tried to schedule my first hatch around St. Patrick's Day and haven't seen any reason to change that practice.


