Go Rustic with Barnwood
by
Kat Yares
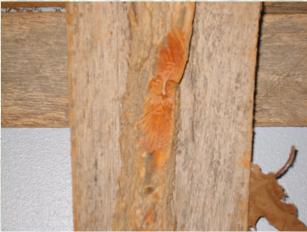
Many city dwellers wish that they lived in the country, but for most that is impossible. One of the ways you can bring the country look home to the city is by creating and building your own weathered barnwood furniture. For those who already live in the country, the look is a perfect fit.
While doing this may require sweat equity on the home owner's part, the resulting coffee or end table, entertainment center or nightstand will become a treasure piece in your home. Finding weathered barnwood doesn't have to be a hard task. Look for your areas free papers that have classified advertising. Newspapers such as The Thrifty Nickel or something similar seem to work best. Post an ad looking for barnwood.
You will get numerous calls from 'antique' dealers offering to sell you the wood at outrageous prices. Take their names and numbers just in case. With any luck, you will get a phone call from an old farmer saying that he has an old barn ready to be torn down. With more luck, he'll tell you the wood is already on the ground. Old barns are torn down every day to make room for newer, more weatherproof buildings. Only buy barnwood if you cannot find someone giving it away.
Once you find your barnwood, it's time to bring it home. Rent a truck if you can't find a friend with a pick-up. Before you begin to build anything, make sure the wood you've chosen for your piece if free of old nails. Either use a stud finder or wear an extra heavy leather glove to brush the surface of the wood to find the nails.
The simplest item to build from your barnwood would be a bookcase. While the wood can be cut with a handsaw, a power saw will make the work go faster. Measure the space you have available and cut two long pieces to be the sides of your case. Decide how many shelves will fit that height. Plan for at least a foot between shelves to allow for larger books and trinkets. Cut two extra pieces for the top and bottom of the bookcase.
Look carefully at the two long pieces and decide which side you want facing out. On the inside, use a chalk line to lay out your shelf spacing. With a drill and wood screws, attach your top and bottom pieces to both of the side shelf pieces, keeping them square.
Lay your box where the open space for shelves is easy to maneuver. Insert and attach one shelf at a time, using your chalk lines for guidance, until all shelves are in place. You will want the smoothest side to be up, as this is where you will put your books and is the side that will be seen.
Stand your bookshelf up and place it in the space you choose for it.
This method can be used to create entertainment centers also. Depending on the width of the wood you may have to double up the width of the sides Use barnwood scraps and wood screws to hold it together. Use more barnwood to create doors, purchase hinges, and handle hardware that helps create the look you want.
Coffee and end tables can be made using the same methods to give a room a completed look. The key to building anything, made from weathered barnwood or not, is careful measurements and having the right tools on hand. One weekend in the garage will give you plenty of time to create many lasting pieces. After all, weathered barnwood has already passed the test of time.


